Traveler using ai

AI Becomes a Key Tool for Travelers: 28% Use It to Organize Trips

Artificial intelligence (AI) isn’t just transforming workplaces—it’s also changing the way people plan their journeys. According to a recent Kaspersky study, nearly one in three travelers (28%) already rely on AI tools when organizing trips. An overwhelming majority of those travelers (96%) reported being satisfied with the experience, and 84% said they intend to continue using AI for future travel planning.

Growing Role of AI in Daily Life

AI has become a standard part of internet use, reshaping how people search for and verify information. Younger generations are the most active users: 88% of people under 35 reported having tried AI services, compared to 54% of those over 54. While research (76%), business tasks (45%), and learning (40%) remain the most common uses, travel planning is steadily gaining importance.

How Travelers Use AI in Planning

Among those who use AI to prepare for their trips, research remains the most frequent application:

  • Activities and events – 70% used AI to identify tours, attractions, or shopping options.
  • Accommodation – 66% relied on AI recommendations when choosing where to stay.
  • Restaurants – 60% requested lists of dining options.
  • Tickets and transport – 58% turned to AI for flight or transport searches.

Families with children were found to use AI more actively than travelers without children, suggesting the technology is particularly valued as a time-saving tool.

Booking with AI Services

While many travelers use AI for research, fewer rely on it for final reservations. The study found that:

  • 45% booked hotels through AI services,
  • 43% purchased tickets,
  • 38% reserved restaurants.

Notably, 45% of respondents reported turning to AI for visa and migration guidance. This raises potential concerns, as incorrect or incomplete advice could result in disrupted travel plans. A recent case involving an Australian writer who missed a conference in Chile due to incorrect AI-generated visa information underscores the risks.

Why Travelers Turn to AI

According to Kaspersky experts, the growing use of AI in travel planning reflects travelers’ preference for personalized, time-efficient solutions. While the technology can streamline research and decision-making, users are advised to critically evaluate the reliability of information before taking action.

Security Recommendations

To help travelers stay safe while using AI tools, Kaspersky recommends the following:

  • Double-check all AI-generated information before booking.
  • Confirm the authenticity of websites before making payments or reservations.
  • Use mobile internet options such as eSIM to stay connected abroad.
  • Always verify Wi-Fi networks, use a VPN, and avoid automatic connections to unknown hotspots.
  • Protect devices with strong passwords, avoid leaving them unattended in crowded areas, and install trusted cybersecurity solutions.
The study was conducted by Kaspersky’s market research team in partnership with Toluna during the summer of 2025. A total of 3,000 respondents from 15 countries took part, including Argentina, Chile, China, Germany, India, Indonesia, Italy, Malaysia, Mexico, Saudi Arabia, South Africa, Spain, Turkey, the United Kingdom, and the United Arab Emirates.

Screenshot from 2025-08-21 11-30-48

How to Change Your Password on Gmail

Your Gmail account is more than just email. It’s also the login for Google Drive, Photos, Calendar, and countless apps linked to your Google profile. Because it holds so much personal data, keeping your password secure is essential. If you suspect unusual activity, forgot your old password, or simply want to update it to something stronger, Google makes the process straightforward.

Steps to Change Your Gmail Password

Here’s the fastest way to update your Gmail password:

  1. Go to your Google Account: Visit myaccount.google.com
  2. Open Security Settings: In the left menu, select Security.
  3. Find Password Option: Scroll to “Signing in to Google.”
  4. Click Password: Google will ask you to verify your identity.
  5. Enter Your Current Password: Confirm that it’s really you.
  6. Create a New Password: Make it strong (at least 12 characters, with uppercase, lowercase, numbers, and symbols).
  7. Save Changes: Re-enter the new password to confirm.

Once updated, you’ll be logged out of most devices and will need to sign back in with your new credentials. This helps prevent unauthorized access.

What If You Forgot Your Gmail Password?

If you don’t remember your current password, you can still reset it. Here’s how:

  1. Go to the Google Account Recovery page
  2. Enter your Gmail address and click Next.
  3. Choose a recovery method (Google may send a verification code to your linked phone number or recovery email).
  4. Enter the code you receive.
  5. Create and confirm a new password.

Tip: If you don’t have access to your recovery phone or email, Google may ask other questions (like when you created the account) to confirm it’s you. The more recovery options you’ve added in advance, the easier this process will be.

Why You Should Change Your Gmail Password

A Gmail password isn’t just about checking email — it protects everything tied to your Google account. Updating it regularly helps:

  • Block unauthorized access if your details were exposed in a data breach.
  • Keep files, contacts, and apps safe, since many third-party services connect to Gmail.
  • Maintain control if you notice suspicious logins from unknown devices.

Even if nothing unusual has happened, updating your password once in a while is a good digital habit.

Extra Security Tips

Changing your password is only part of keeping your Gmail secure. For stronger protection:

  • Turn on 2-Step Verification: This requires a code from your phone in addition to your password.
  • Don’t reuse old passwords: Always create something unique.
  • Use a password manager: These tools generate and store complex passwords for you.
  • Check your account activity: Google shows a list of recent devices that have signed in — review it regularly.

Google meet Registration

How to Register on Google Chat: A Simple Walkthrough

If you’ve ever wanted a messaging app that just works with everything else you’re already using, Google Chat might be exactly what you’re looking for. It’s part of Google’s workspace tools (the same family as Gmail, Docs, Drive, and Meet), which means it’s designed to make teamwork and personal communication easier.

But before you can start sending messages, creating spaces, or sharing files, you’ll need to get registered. Don’t worry — this process is about as straightforward as it gets, especially if you already have a Google account.

Do You Already Have a Google Account?

Here’s the first thing to know: Google Chat doesn’t have a separate sign-up form. If you’ve ever used Gmail, YouTube, or even Google Drive, then you already have what you need.

For those who don’t have one yet, creating a Google account is free and takes just a couple of minutes. You’ll be asked for basic details like your name, birthday, and email preferences. Once that’s done, you’re officially ready to access Google Chat.

How to Get Started With Google Chat

There are two main ways to register and log in:

  1. On Desktop:
  1. Once inside, you’ll see a clean interface with options for direct messages, group chats (called “Spaces”), and integration with Meet.
  2. On Mobile (Android or iOS):
    • Download the Google Chat app from the Play Store or App Store.
    • Open it and log in with your Google account.
    • You’re ready to chat on the go, sync across devices, and receive instant notifications.

Why Bother With Google Chat?

You might be thinking: “Why use this when I already have WhatsApp, Messenger, or Slack?” Good question.

The biggest advantage is integration. Google Chat works seamlessly with the rest of Google’s apps. That means you can:

  • Share a Google Drive file straight into a chat.
  • Create a task list inside a group Space.
  • Launch a Google Meet call directly from your conversation.
  • Search across messages and files just like you search in Gmail.

It’s less about being a stand-alone app and more about being part of a bigger productivity system.

Extra Tips for a Smooth Start

  • Enable notifications wisely: You don’t want your phone buzzing 24/7. Adjust settings so you only get alerts for important conversations.
  • Use Spaces for projects: If you’re collaborating on work or school tasks, Spaces keep everything organized — messages, files, and tasks all in one place.
  • Bookmark it: On desktop, pin Chat in your browser tabs or keep it open in Gmail so you don’t forget to check messages.

Registering on Google Chat isn’t really about creating something new — it’s about unlocking a feature that’s already part of your Google account. Once you’re signed in, you can use it to stay connected with friends, collaborate on group projects, or manage work tasks, all without juggling multiple apps.

If you’re already living in the Google ecosystem, Chat is worth exploring. It keeps your communication and productivity tools under one roof, which saves you time and makes life a bit easier.

Chatgpt Register

How to Register on ChatGPT: Everything You Need to Know

ChatGPT has quickly become one of the most popular AI platforms in the world. From students looking for help with assignments, to professionals drafting reports, to everyday users asking quick questions — millions rely on it daily. But before you can explore everything it offers, you’ll need to create an account.

The good news is that registering on ChatGPT is simple, free, and takes only a few minutes. Whether you’re signing up on desktop or mobile, the process is almost the same. Here’s a complete guide that walks you through the steps, with tips to avoid common issues.

Why Do You Need to Register?

You might be wondering: can’t I just try ChatGPT without an account? The short answer is no. OpenAI requires registration for several reasons:

  • Personalization – Your account keeps track of your chats and settings.
  • Security – Verification prevents spam and ensures real users only.
  • Access to features – Without an account, you can’t use free or paid tools.
  • Upgrades – Registration allows you to later switch to ChatGPT Plus if you want access to faster, more advanced models.

So, while it may feel like an extra step, registration actually improves your experience.

Step 1: Go to ChatGPT

Start by visiting chat.openai.com, in your browser. Alternatively, download the ChatGPT app from the App Store (iOS) or Google Play (Android).

On the homepage, you’ll see the “Sign up” button. Click or tap it to begin.

Step 2: Choose How to Sign Up

You’ll have a few options for creating an account:

  • Email address + password — traditional method, works on all devices.
  • Google account — quick, one-click sign-in.
  • Microsoft account — especially useful if you already use Outlook or Office.
  • Apple ID — convenient for iPhone and Mac users.

If you choose the email option, make sure your password is unique and strong — ideally a mix of letters, numbers, and symbols.

Step 3: Verify Your Details

After entering your basic info, you’ll be asked for your name, date of birth, and phone number. A text message with a verification code will be sent to confirm your account.

This step is required. Without verifying your phone number, you can’t complete registration.

Tips for a Smooth Registration

  • Double-check your email spelling before submitting.
  • If you don’t get a verification SMS, wait a few minutes before requesting a new code.
  • Keep your login method consistent (for example, always use Google or always use email) to avoid confusion later.
  • Bookmark chat.openai.com for quick access.

Frequently Asked Questions

Is ChatGPT registration free?
Yes. You can use the free plan without paying anything.

Can I sign up without a phone number?
No. Phone verification is required for all new accounts.

Can I use ChatGPT without downloading the app?
Absolutely. The web version works on any browser.

What’s the difference between free and Plus accounts?
The free version gives you access to core features, while ChatGPT Plus offers faster responses and priority access to the latest AI models.

Can I change my login method later?
Yes. You can link or unlink accounts in your settings, but it’s best to stick with one method from the start.

Airbnb Registration

How to Register on Airbnb: A Beginner’s Guide

Airbnb has become one of the most popular platforms for booking travel stays and unique experiences around the world. Whether you’re planning your next trip or thinking of hosting guests in your own home, the first step is creating an account. Registering on Airbnb is quick and free, and you can do it on both desktop and mobile in just a few minutes.

Getting Started

To begin, head over to Airbnb’s website or download the Airbnb app from the App Store (iOS) or Google Play (Android). Both options give you full access to the platform.

On the homepage, you’ll see a “Sign Up” button. Clicking this will open a registration form where you’ll be asked how you’d like to create your account.

Ways to Register on Airbnb

Airbnb gives you a few simple options for creating your account:

  • Using your email address → Enter your email, create a password, and continue filling out your details.
  • Using your phone number → Enter your number, confirm it with a code, and complete your profile.
  • Social logins → You can also sign up with your Google, Apple, or Facebook account if you want a faster setup.

Completing Your Profile

Once you’ve created the account, Airbnb will guide you through setting up your profile. This step is important because it helps build trust between guests and hosts. You’ll typically need to provide:

  • Your full name (as it appears on your government ID).
  • Date of birth.
  • A profile photo.
  • Payment details (if you plan to book a stay).

Airbnb may also ask you to verify your identity with a government-issued ID. This adds another layer of security and helps prevent fraud.

Tips for a Smooth Registration

While signing up is straightforward, here are a couple of quick tips to make the process even easier:

  • Use a real email or phone number so you don’t miss important notifications about bookings.
  • Add a friendly profile photo — people feel more comfortable booking with verified, authentic-looking users.
  • Fill out your bio briefly if you plan to host. Guests appreciate knowing a little about who you are.

After You Register

Once your account is active, you can start exploring Airbnb. As a guest, you’ll be able to search for stays, filter by location, price, and amenities, and make bookings directly from the app or website. If you’re interested in hosting, you can set up your listing under the “Become a Host” section.

Common Questions

Do I need to pay to register on Airbnb?
No. Registration is free. You’ll only pay when you book a stay or if you’re a host, Airbnb takes a small service fee from bookings.

Can I use Airbnb without ID verification?
For some listings, yes — but many hosts require identity verification for security reasons.

Is Airbnb safe to use?
Yes. Airbnb uses secure payment systems and an identity verification process to help keep both guests and hosts safe.

Chatgpt change password

How to Change Your Password on ChatGPT

Protecting your ChatGPT account is essential for safeguarding conversation history and personal data. Whether you’ve forgotten your password or simply want to strengthen security, this comprehensive guide walks you through resetting your ChatGPT password in minutes.

Important Note: Unlike most platforms, ChatGPT doesn’t offer a traditional password change option in settings. Instead, you’ll always use the “forgot password” process, even when you remember your current password.

Why Update Your ChatGPT Password?

Several compelling reasons make regular password updates crucial:

  • Security breaches — Unfamiliar prompts or suspicious login notifications demand immediate action
  • Regular maintenance — Furthermore, security experts recommend updating passwords every 3-6 months
  • Compromised credentials — Additionally, if you’ve reused the password elsewhere and that service was breached, updating becomes critical
  • Peace of mind — Ultimately, protecting your AI conversations and professional information ensures long-term security

Step-by-Step Password Reset Process

Desktop Instructions

Step 1: Log Out First, locate your profile icon in the bottom-left corner, then select “Log out” from the menu.

Step 2: Access Login Page Next, navigate to chatgpt.com and click the “Log in” button to proceed.

Step 3: Start Reset Process Now, here’s where it gets interesting:

  • Begin by entering your email address
  • Subsequently, click “Continue”
  • Most importantly, select “Forgot password?” (even if you remember it perfectly)

Step 4: Request Reset Email At this point, you’ll need to:

  • Re-enter your email for verification
  • Then click the green “Continue” button
  • Immediately check your inbox for the reset email

Step 5: Complete Reset Once the email arrives:

  • First, open the message from OpenAI titled “Change Password for ChatGPT”
  • Following that, click the reset link provided
  • Create and confirm your new password carefully
  • Finally, click “Reset password” to save changes

Step 6: Verify Access To ensure everything worked correctly, log back in with your new credentials.

Mobile App Instructions

Similarly, the mobile process follows nearly identical steps:

  • Initially, open the ChatGPT app and log out if needed
  • After that, tap “Log in” and enter your email
  • Subsequently, select “Forgot password?”
  • Then follow the email instructions carefully
  • Ultimately, log in using your new password

Troubleshooting Common Issues

Not Receiving Reset Email?

When the reset email doesn’t arrive, several solutions can help:

  • Initially, check spam and junk folders thoroughly
  • Meanwhile, verify you’re using the correct registered email
  • However, if you signed up with Google/Microsoft/Apple, use that login method instead
  • Additionally, try clearing your browser cache before retrying
  • Finally, allow 5-10 minutes for potential server delays

Using Google/Microsoft/Apple Sign-in?

For those who authenticated with third-party providers, the situation differs:

  • Essentially, you don’t have a ChatGPT-specific password
  • Consequently, your security depends entirely on that provider’s account
  • Therefore, update the password through Google/Microsoft/Apple instead
  • Moreover, consider enabling two-factor authentication on that primary account

Can’t Change Email Address?

Unfortunately, OpenAI doesn’t allow email changes. Nevertheless, to use a different email:

  • Initially, create a new ChatGPT account
  • However, remember that conversation history cannot be transferred
  • Subsequently, delete the old account via OpenAI’s Privacy Request Portal

Creating a Strong ChatGPT Password

Effective password creation requires following these security best practices:

Essential Requirements:

  • Above all, use minimum 12-16 characters
  • Furthermore, mix uppercase, lowercase, numbers, and symbols effectively
  • Meanwhile, avoid personal information or dictionary words entirely
  • Most importantly, never reuse passwords from other accounts

Pro Tip: Consider using a passphrase like “Purple7!Elephant$Dance9” — it’s both memorable and secure.

Password Manager Recommendation: Tools like Bitwarden or 1Password not only generate complex passwords but also store them safely.

Additional Security Measures

Enable Two-Factor Authentication

Although currently limited, 2FA options are expanding:

  • First, check Settings → Security for available options
  • However, note that it’s currently limited to API/developer access
  • Nevertheless, use authenticator apps whenever possible

Monitor Your Account

Regular vigilance prevents security issues:

  • Periodically review conversation history for anomalies
  • Meanwhile, watch for unfamiliar prompts or responses
  • Immediately report suspicious activity when detected

Safe Usage Practices

Beyond passwords, smart habits enhance security:

  • Above all, never share credentials with others
  • Instead, use ChatGPT Teams for collaboration needs
  • Furthermore, remain mindful of sensitive information in chats

FAQs

How often should password updates occur? Ideally, every 3-6 months ensures optimal security.

Is email access required for password changes? Yes, email verification remains mandatory. However, if you’ve lost email access, contact OpenAI support immediately.

Does resetting log me out everywhere? Indeed, you’ll need to sign in again across all devices.

What happens if someone else changed my password? In this case, contact OpenAI support immediately through their help center.

Is reusing my old password possible? While technically feasible, doing so completely defeats the security purpose. Therefore, always create new, unique passwords.

Chatgpt delete chat

How to Delete All Chats on ChatGPT

If you use ChatGPT regularly, your chat history can pile up quickly. Whether you want a fresh start, more privacy, or simply less clutter, deleting your chats is easy. In this guide, you’ll learn exactly how to delete all your conversations on ChatGPT in just a few clicks.

Why Delete Your ChatGPT Chats?

According to marketing experts like Neil Patel and Ann Handley, clarity and simplicity matter most when it comes to online guides. So before we jump into the steps, here’s why people usually delete their ChatGPT history:

  • Privacy protection → Old conversations might include personal or business details you don’t want stored.
  • Decluttering your account → A long list of chats can be distracting and harder to manage.
  • A fresh start → Sometimes you just want to clear everything and begin again with new conversations.
  • Data management → Some users prefer to control what data is stored, especially when using AI tools regularly.

How to Delete All Chats on ChatGPT (Desktop Version)

If you’re using ChatGPT in your web browser, follow these steps:

  • Log in to your ChatGPT account.
  • On the left sidebar, scroll down to the bottom click on your profile and click Settings (gear icon).
  • In the menu that appears, click on Data controls.
  • Look for the option labeled Delete All Chats.
  • Click it, then confirm when asked to proceed.

Once confirmed, all your past conversations will disappear immediately.


How to Delete All Chats on ChatGPT (Mobile App

If you prefer the ChatGPT mobile app (available on iOS and Android), the process is just as easy:

  • Open the ChatGPT app and sign in if necessary.
  • Tap the menu icon (☰) in the top-left corner.
  • Click on your profile name.
  • Find the Data controls option and click on it.
  • Select Delete All Chats.
  • Confirm the action, and your history will be erased.

This removes your chats from all devices linked to your account — meaning if you delete them on mobile, they’ll also be gone from desktop.

What Happens When You Delete All Chats?

Before you clear your history, it’s good to know what happens behind the scenes:

  • The deletion is permanent → Once removed, your chats cannot be recovered.
  • Export your history first → If you want to save your old conversations, go to Settings → Data Controls → Export Data. You’ll receive a file with your chat history by email.
  • It doesn’t affect your account → Deleting chats does not delete your account or subscription. It only clears the list of conversations.
  • Your preferences remain → Settings like themes, login info, or subscription details will stay the same.

Alternatives to Deleting All Chats

If you don’t want to remove everything, you can:

  • Delete individual chats → On desktop, hover over a conversation in the sidebar and click the trash icon. On mobile, swipe left on the chat and tap Delete.
  • Turn off chat history → Go to Settings → Data Controls → Chat History & Training. Turning this off means new conversations won’t be saved.

This way, you can manage your history without wiping everything at once.

FAQs

Can I recover deleted ChatGPT chats?
No. Once you clear your chats, they’re permanently deleted. If you want to keep them, use the Export Data option before deleting.

Does deleting chats improve performance?
Not really. Deleting chats won’t make the app faster, but it does help with organization and privacy.

Can I delete chats without affecting my subscription?
Yes. Whether you’re on the free plan or ChatGPT Plus, deleting chats only removes conversations, not your account or billing details.

Can I delete chats from just one device?
No. When you delete chats, they disappear from all devices linked to your account.

Is there an option to auto-delete chats?
Currently, no. You’ll need to manually delete them or turn off chat history to prevent future saving.

digital conference

Why Your Digital Agency Team Should Attend Digital Conferences

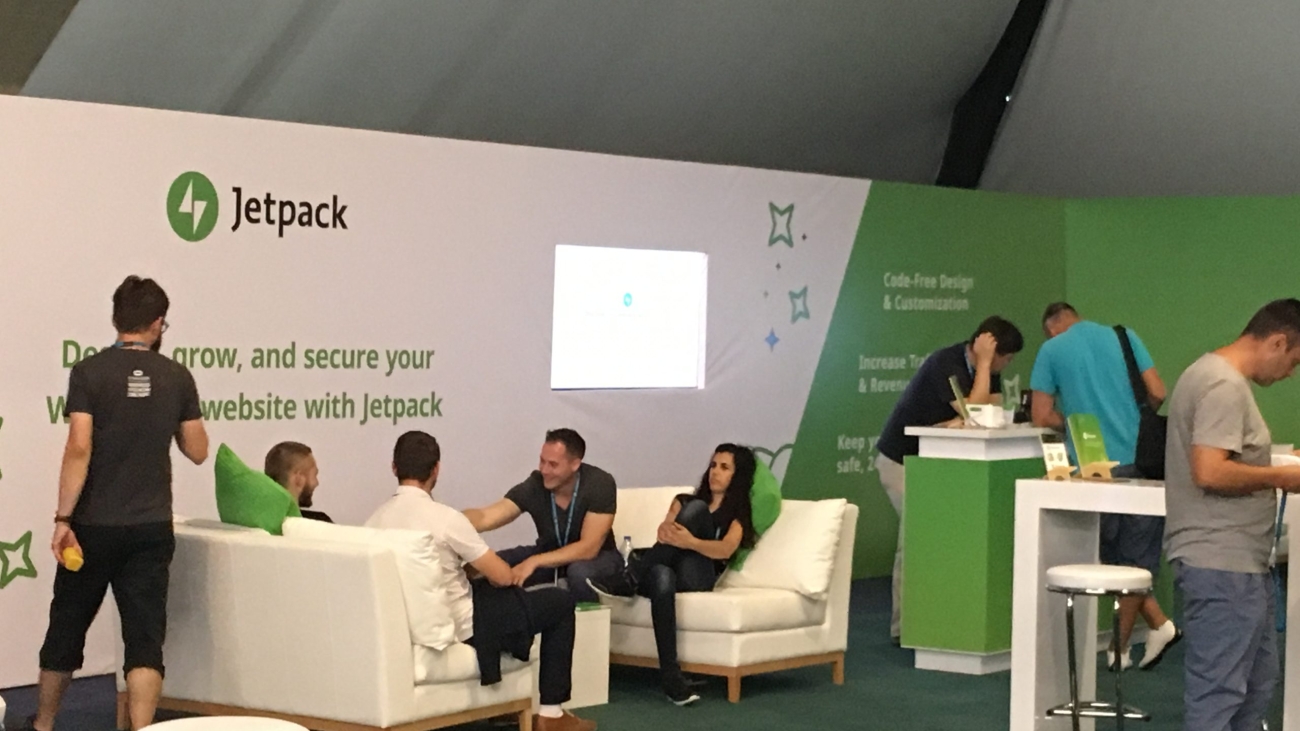
In the fast-paced world of digital marketing, staying ahead of the curve is essential. Digital conferences are more than just networking events; they’re opportunities to level up your agency’s skills, gain fresh perspectives, and connect with industry leaders. So, why should your agency prioritize attending these events? Let’s explore.

1. Stay Ahead of Industry Trends

Digital marketing evolves rapidly, with new tools, platforms, and strategies emerging almost daily. Conferences are hotbeds of innovation, where thought leaders share the latest trends before they hit the mainstream. Your team will return armed with actionable insights to keep your clients ahead of their competitors.

2. Build Valuable Connections

Networking isn’t just a buzzword—it’s a business advantage. Conferences attract the best in the industry, from potential partners and clients to influencers and top-tier professionals. Building relationships at these events can lead to new business opportunities and collaborations.

3. Enhance Team Expertise

Workshops, panels, and keynotes offer hands-on learning opportunities. Whether it’s mastering the latest Google algorithm update or perfecting video ad strategies, conferences provide knowledge your team can implement immediately.

4. Inspire Creativity and Innovation

Stepping away from daily routines and engaging with new ideas often sparks creativity. Conferences expose your team to unique campaigns, case studies, and ideas that can inspire innovative strategies for your clients.

5. Showcase Your Agency’s Expertise

Attending conferences also positions your agency as an engaged, forward-thinking leader in the industry. Encourage your team to share insights from the event on social media or your blog, demonstrating your commitment to staying at the forefront of digital marketing.

6. Boost Team Morale

Conferences are not only educational but also fun! Giving your team the chance to travel, learn, and bond in a new environment can reinvigorate their enthusiasm for work and create lasting memories.

7. Stay Competitive

If your competitors are attending these conferences and you’re not, you risk falling behind. By being present, your agency ensures it remains competitive and up-to-date with the latest industry standards.

Investing in digital conferences isn’t just an expense; it’s an investment in your agency’s growth, creativity, and future success. Equip your team with the knowledge, skills, and connections to deliver cutting-edge strategies for your clients.

Ready to take your agency to the next level? Start by planning your team’s attendance at the next big digital conference!